Mattermost is a solid, open-source option for team communication and collaboration. You can opt to go with the official hosted Mattermost service, or you can deploy a Mattermost server to either your local data center or to a third-party cloud host.
SEE: 40+ open source and Linux terms you need to know (TechRepublic Premium)
I want to show you how you can quickly deploy a Mattermost instance as a virtual machine. I’ll be demonstrating with VirtualBox, but you can always deploy the service via your virtual machine technology of choice.
One thing to note is that the Mattermost service you deploy will not have all of the features found in the official hosted version. This version of Mattermost is centered specifically around communication. The good news is that this service deploys with installable plugins for services/features, such as:
- Agenda
- AWS SNS
- CircleCI
- Confluence
- DigitalOcean
- GitHub
- GitLab
- Jenkins
- Jira
- Skype
- Webex
- Zoom
Before you can add those plugins and integrations, you must first deploy Mattermost and that’s exactly what I’m going to show you.
What you’ll need
To successfully deploy Mattermost as a virtual machine, you’ll need a running instance of your VM Manager. As I mentioned before, I’ll be demonstrating with VirtualBox. If you’re using a different VM technology, you’ll need to alter the deployment instructions to fit your virtual platform.
Let’s get started.
How to deploy Mattermost as a virtual machine
The first thing you must do is download the virtual appliance that was built by the developers of Turnkey Linux. For VirtualBox, you’ll want to download the VM file, which has a .ova extension. The file is only 688MB, so it’s not too large.
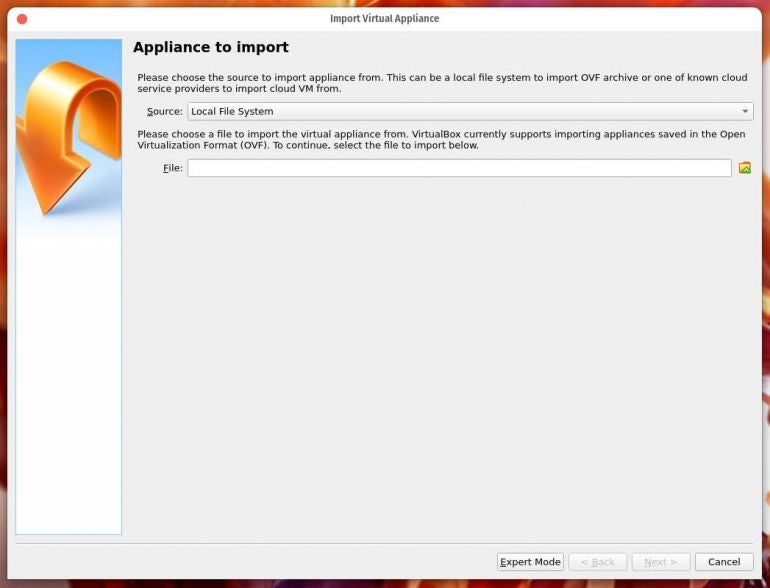
Once the file is downloaded, open VirtualBox and click File | Import Appliance. In the resulting window (Figure A), click the file button to the right of the File text area and locate the .ova file you just downloaded.
Figure A
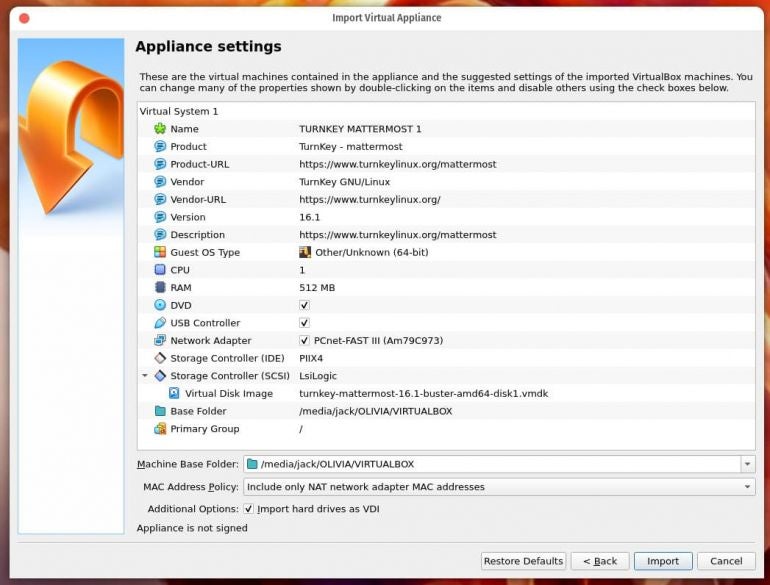
Click Next and, in the resulting window (Figure B), make sure to customize any options you need (such as Name, CPU and RAM).
Figure B
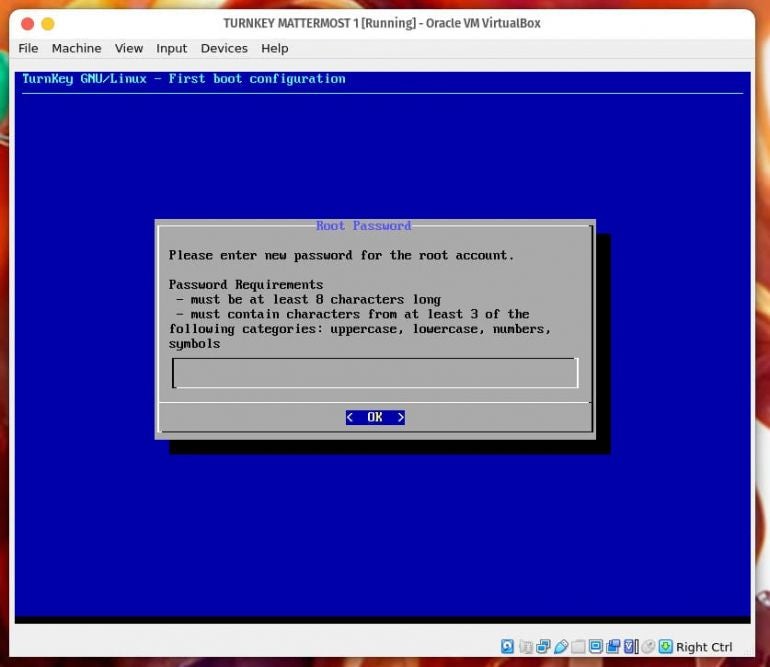
Click Import to launch the process. When the import completes, start the virtual machine. When the virtual machine boots, you’ll be prompted to configure a few items (such as a password for the root account–Figure C).
Figure C
You will also be required to:
- Create a password for the Postgres account.
- Create a password for the admin account.
- Configure an email address for the admin account.
- Configure a domain to serve Mattermost.
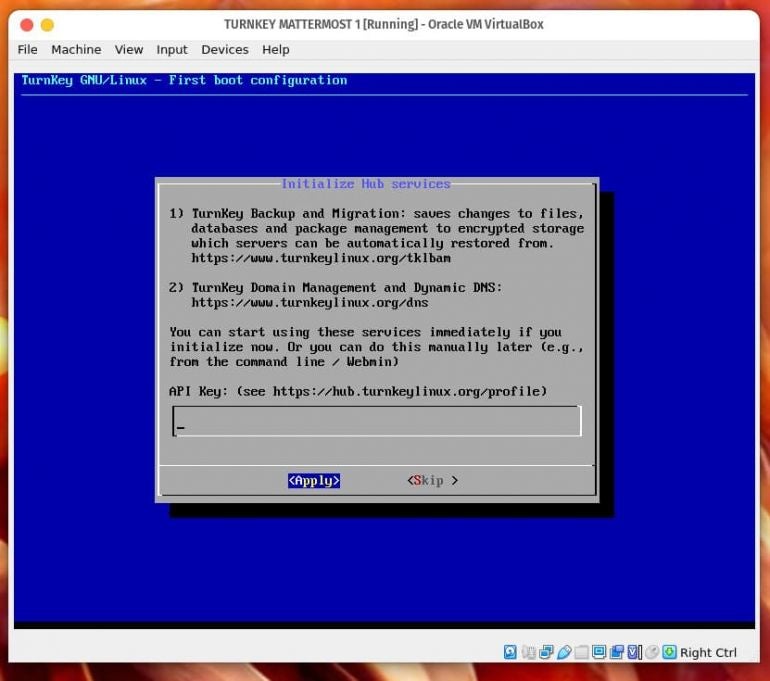
At the end of the wizard (Figure D), you can Skip the initialization of the Hub services.
Figure D
Finally, add an email for system notifications (Figure E).
Figure E
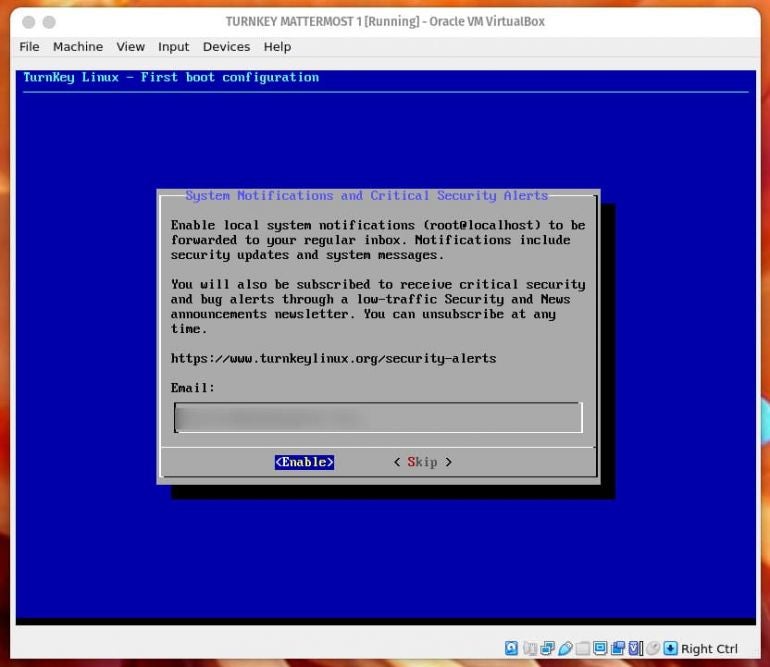
Once you verify that email address, you’ll be asked if you want to configure automated security updates (Figure F).
Figure F
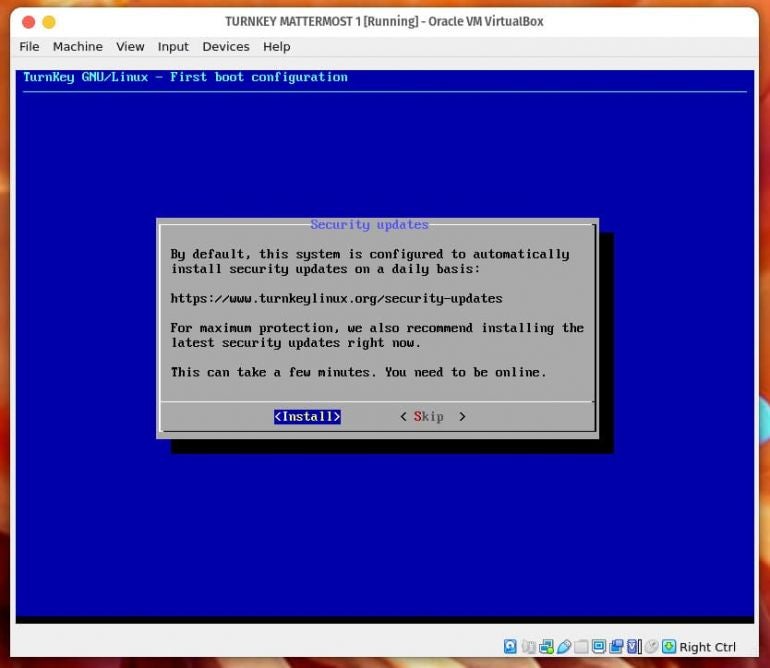
Go ahead and enable the automated security updates by tabbing to Install and hitting Enter on your keyboard.
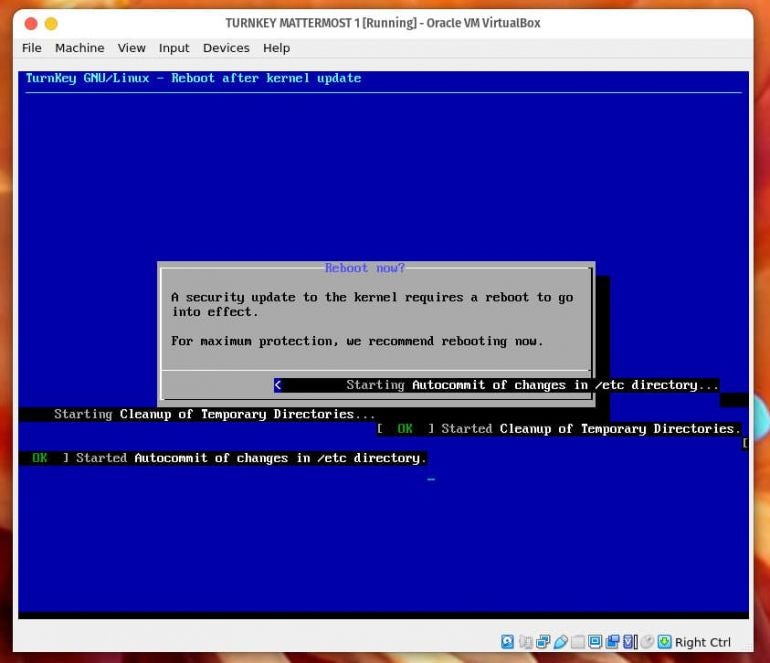
The installation will kick off in earnest and you can sit back and watch the output fly by. The process should take a couple of minutes to complete and you’ll be prompted to reboot (Figure G).
Figure G
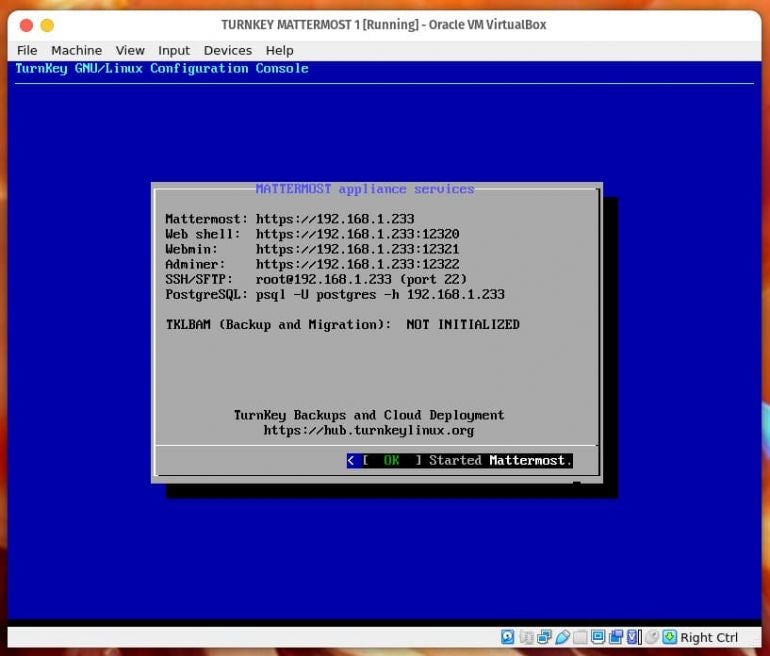
After the reboot completes, you’ll be presented with a screen that gives you all the URLs for you to access the various Mattermost components (Figure H).
Figure H
Congratulations, you now have a running instance of Mattermost you can use for internal communication and collaboration.
Subscribe to TechRepublic’s How To Make Tech Work on YouTube for all the latest tech advice for business pros from Jack Wallen.
