
Image: Pavel_R, Getty Images/iStockphoto
Hyperlinks are everywhere and hardly need an explanation, but just in case you’re using them but don’t know where they’re called, a hyperlink is text or content that you click to go somewhere else. The content you click is usually explanation enough. For instance, you might click a hyperlinked title to read that article. In a Microsoft Word article, you might include hyperlinks to other parts of the document, other documents, or even web sites.
SEE: Recap: Microsoft Build 2020 (free PDF) (TechRepublic)
In this article, you’ll learn how to add hyperlinks to a Word document. (What you learn applies to Outlook as well. In addition, I’ll use the term linked throughout this article.)
I’m using Microsoft 365, but you can use earlier versions. You can work with your own text or use the downloadable demonstration .docx file. This article isn’t appropriate for the browser edition of Word.
How to link to a web page
Linking to a web page is easy and becoming a common practice. In general, a link might take you to a web form or more information about a particular topic. Let’s illustrate with a quick example:
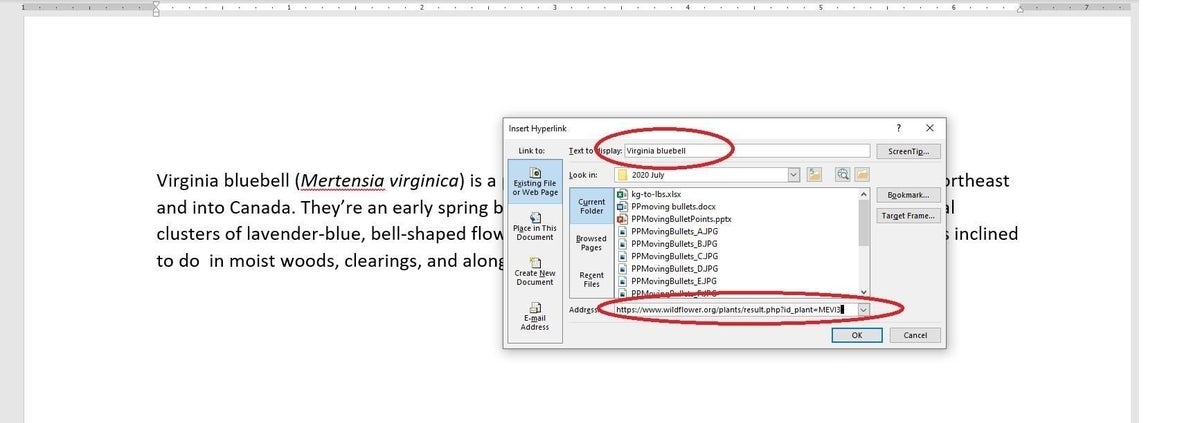
- Open a browser, access any page, and copy the url to the clipboard. For our purposes, you can copy this one: https://www.wildflower.org/plants/.
- Move to the text you want to add the link to, select it, and right-click. In our demo file, that would be the first two words in the first paragraph (Figure A).
- Select Link from the resulting submenu.
- In the resulting dialog, click inside the Address control and paste the copied url. Notice that the text to display displays the selected text Virginia bluebell.
- Click OK.
Figure A
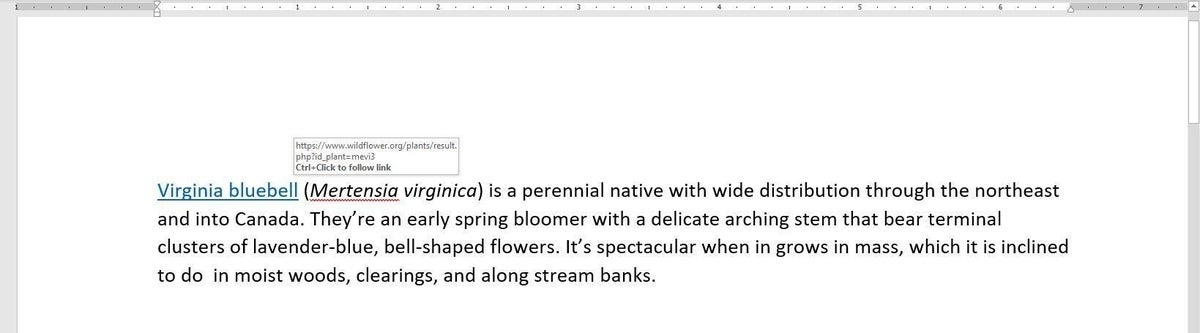
To use the link, hold down the Ctrl key and click the formatted text—Word’s style for links is universal: Underlined, blue font. You can change the format, but the link won’t be obvious to your readers.
The link will open your browser to the linked url. As you can see in Figure B, the url and the instructions for getting there are displayed on screen as a screen tip.
Figure B
How to link to content within the same document
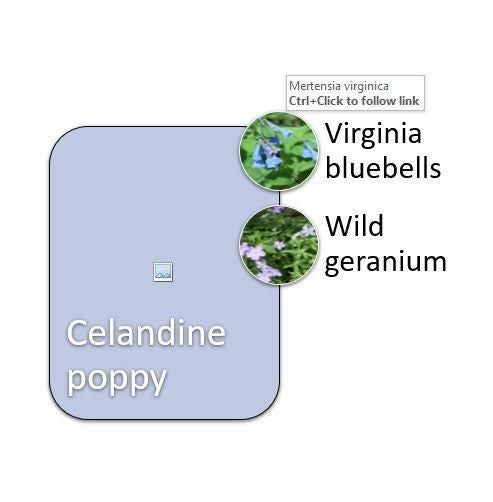
You can use the same process to link text in your documents. Let’s do so now by linking a graphic to text. In the demo file, there’s a picture of bluebells. We’ll add the link to that graphic so clicking it will display the bluebell content. It’s as easy as using a url, but there is one requirement: You need to style the content as a heading or insert a bookmark. In this short illustration, we’ll do the former:
- Begin by adding a heading to the short paragraph on bluebells and style it as Heading 3, and directly apply italics.
- Next, select the bluebell picture, right-click, and choose Link (Figure C). (The picture is partially obscured by the submenu.)
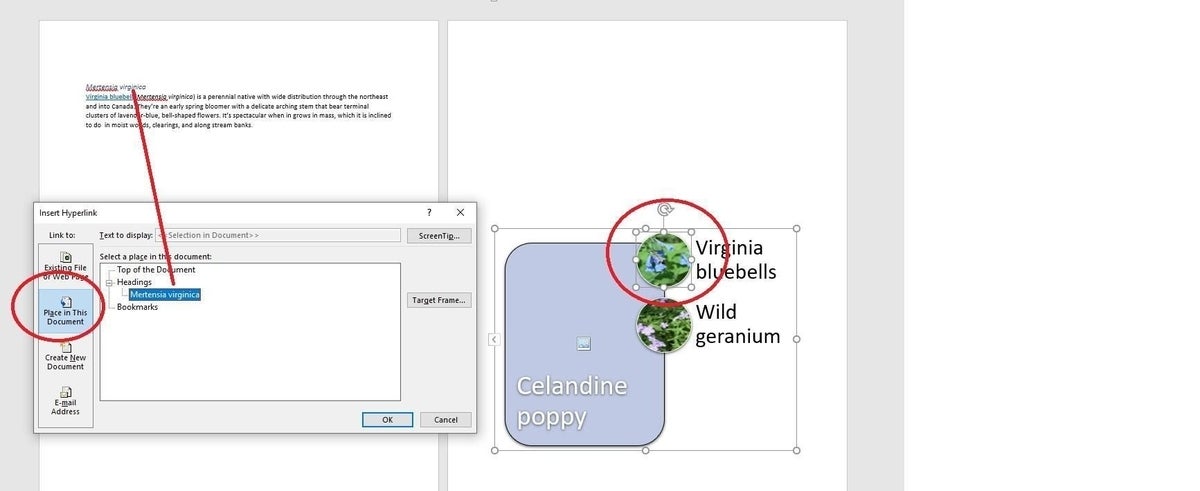
- In the resulting dialog, click Place in This Document in the Link to pane (on the left).
- If necessary, expand the Headings node in the Select a place in this document list (Figure D).
- Click OK.
Figure C
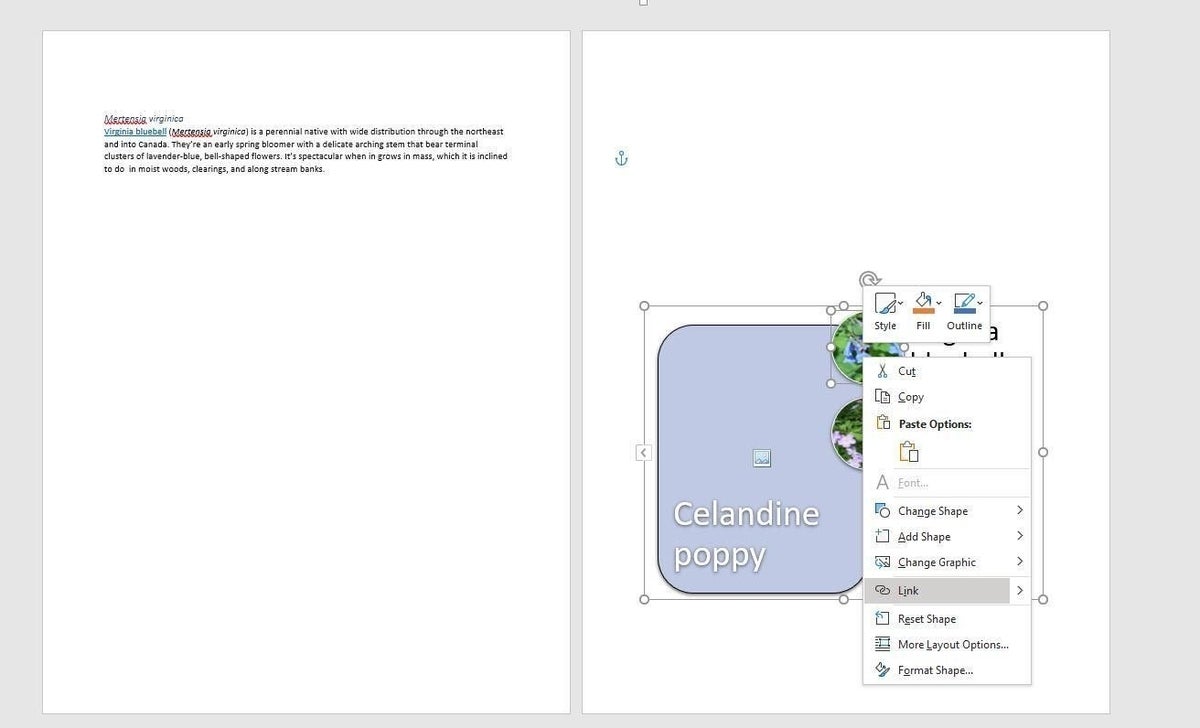
Figure D
As before, when you hover over the linked picture, the screen tip displays the linked content and instructions. In this case, the linked content is the path name of the document, which isn’t all that helpful. Let’s fix that as follows:
- First, copy the heading text (Mertensia virginica) to the clipboard.
- Right-click the picture and choose Edit Link.
- In the resulting dialog, click ScreenTip (top-right).
- In the resulting dialog, paste the heading text (Figure E).
- Click OK twice.
Now when you hover over the bluebell picture, the screen tip displays the heading of the section that the link will access (Figure F).
Figure E
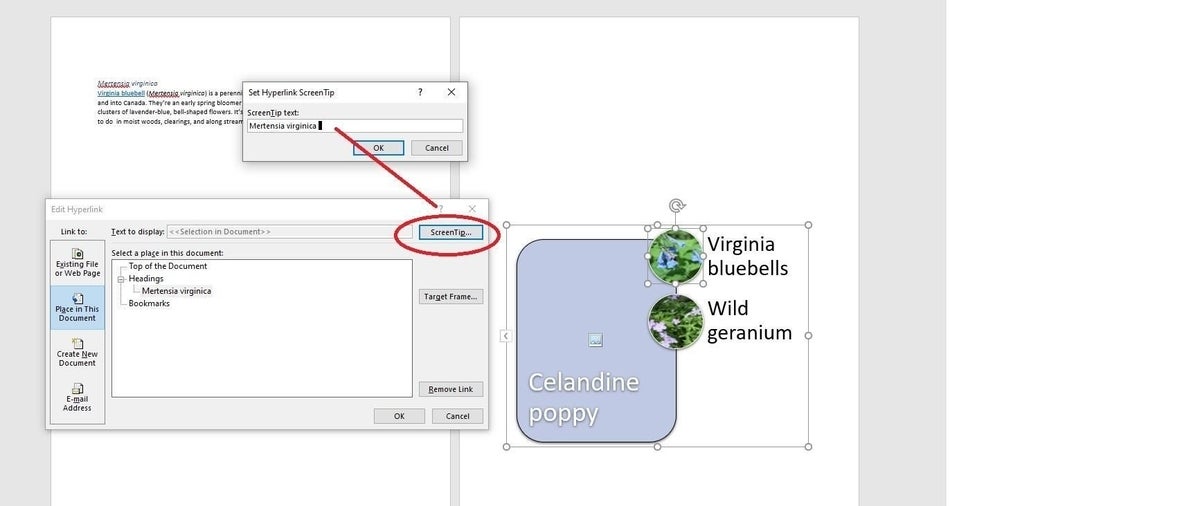
Figure F
The link still works, but now it displays the heading text instead of the document path. You could accomplish the same thing by using a bookmark instead.
How to link to a bookmark
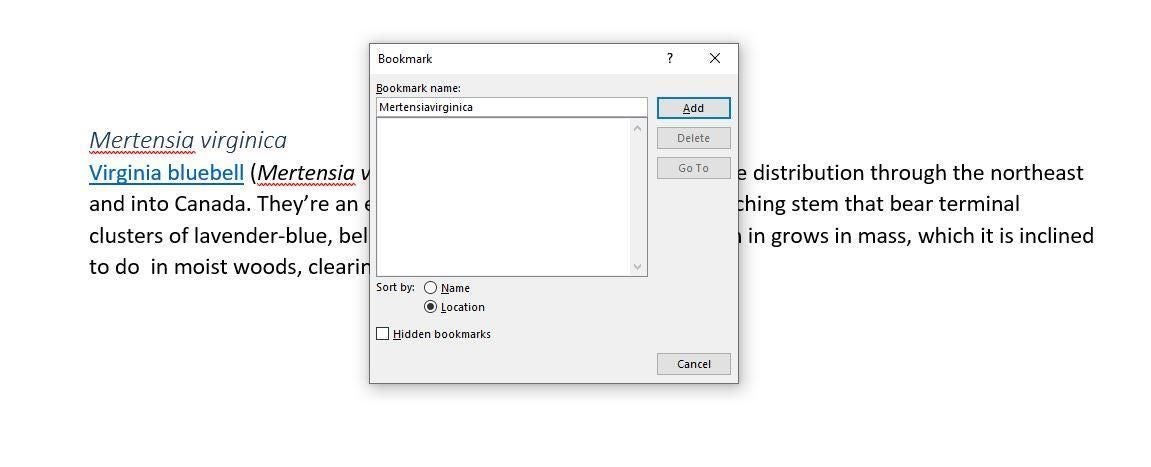
You can use a bookmark if heading text doesn’t exist, but you’ll need a bookmark first. To insert a bookmark, select the text, copy the text to the clipboard, and then do the following:
- Click the Insert tab and then click Bookmark in the Links group.
- In the resulting dialog, enter or paste the bookmark name. As you can see in Figure G, there’s no space between the genus and species. Bookmarks must start with an alpha character and can’t contain a space.
- Click Location (because we’re creating a link).
- Click Add and then click OK.
Figure G
Using the instructions in the last section, change the link from the heading text to the bookmark. In this case, the linked picture works the same way regardless of whether you choose a heading or bookmark. The latter is helpful when there’s no heading text to link to.
SEE: Microsoft Word: How to use AutoCorrect to handle unwanted words (TechRepublic)
To link to another Word document, open the Insert Hyperlink dialog (the same one we’ve been working with all along) and click Existing File or Web Page in the left pane. Doing so will expose your local system so you can locate and select the file. You can also add screen tip text.
Stay tuned
Soon, we’ll run through the same types of examples using screen tips instead of links.